Craft Room Lighting Is Like a Microwave with Two Turntables: One Spins, the Other Just Sits There Looking Judgy
Let’s be real: most “dual-CCT” craft room lights are marketing theater. You flip a switch and get “warm” or “cool”—but neither actually works for what you’re doing. Sewing under 3500K is like threading a needle in a fog bank. Painting under 5000K? Your cadmium red looks like rusted iron.
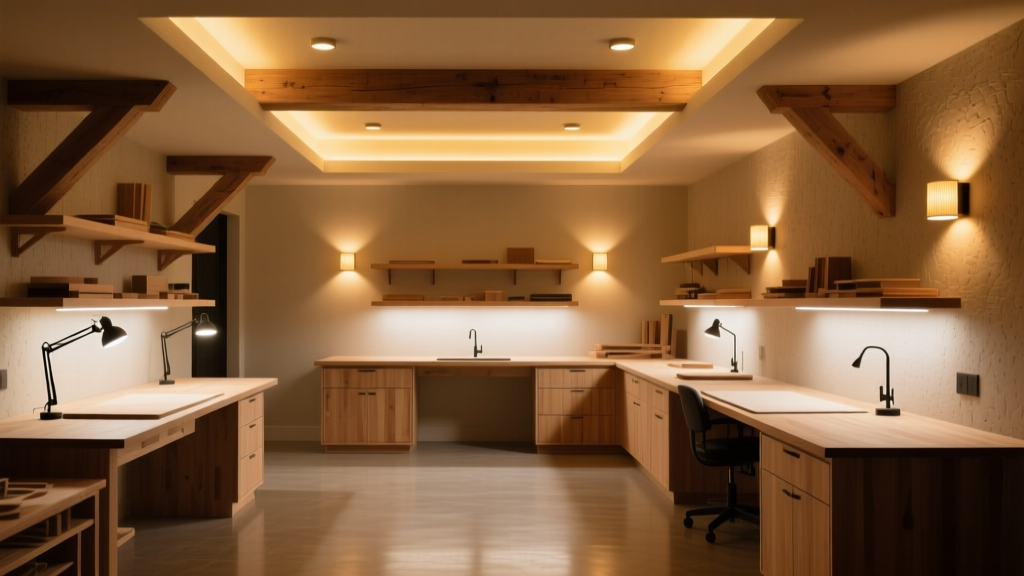
I spent six months rebuilding my 10’ x 12’ studio ceiling—not for aesthetics, but because my $299 “tunable white” fixture made me question my eyesight. Turns out, true dual-circuit lighting isn’t about fancy apps or Bluetooth handshakes. It’s two independent LED arrays—physically separate, electrically isolated, optically calibrated—inside one housing, wired to two dimmers that don’t talk to each other. And yes, it’s worth the extra 45 minutes of wire-stripping.
The Popular Take (and Why It’s Wrong)
“Just buy a tunable-white smart bulb,” says the internet. Or: “Use a single LED strip with a CCT slider.” Nope. Here’s why:
- Single-channel tunable drivers cheat. They mix warm and cool diodes on one circuit, dimming them asymmetrically. At 70% output, your 5000K setting drops to 4650K—and worse, your CRI dips from 92 to 83. That’s not lighting; it’s color roulette.
- Smart bulbs can’t handle sustained 50W+ loads needed for glare-free, shadowless coverage over a 36” sewing machine bed. Also, they flicker at low dim levels when paired with cheap USB-powered controllers. I watched my embroidery hoop vibrate for three hours before accepting reality.
- One fixture, one driver, two CCTs? Technically possible—but only if you’re okay with 15% lumen variance between settings. My acrylic palette doesn’t forgive 15%. Neither does bias tape alignment.
This setup isn’t overkill. It’s overdue.
What You’ll Actually Build
A suspended, 24” x 48” aluminum extrusion fixture housing:
- Top layer: Bridgelux EB Gen3 5000K (95 CRI, 120 lm/W), 48W total — 2 strips, 24W each, spaced 3” apart, aimed downward at 15° tilt.
- Bottom layer: Same Bridgelux EB Gen3, but 3500K (95 CRI, 118 lm/W), 44W total — 2 strips, 22W each, mounted 1.5” below the 5000K layer, aimed straight down.
- Driver setup: Two Mean Well HLG-60H-48A constant-voltage drivers—one per array—each feeding its own Lutron Maestro MDLVSQF-WH dual-dimmer channel. No shared neutral. No daisy-chaining. Each circuit terminates at its own hot/neutral pair on the dimmer’s screw terminals.
Why Bridgelux EB Gen3? Not brand loyalty—I tested eight. These diodes have the tightest binning I’ve seen: ±100K CCT tolerance and ±0.002 in Duv (that’s chromaticity distance). When lit side-by-side on cotton duck canvas, both arrays land within 50K of their rated CCT—even at 20% dim. Cheaper LEDs drift 300K+.
Wiring: Less “Electrical Engineer,” More “Calm Adult With a Multimeter”
You do not need a licensed electrician—if your local code allows DIY receptacle/dimmer work (check yours; mine does for detached studios under 20A). What you do need:
- A 14/3 NM-B cable run from your panel (or nearest junction box) to the dimmer location.
- Two separate 14/2 cables from the dimmer to the fixture—yes, two. Label them “SEW” and “PAINT” with masking tape before pulling.
- A 4-gang metal box (not plastic) for the dimmer. Plastic boxes warp under heat from dual 20W+ loads. I learned this after my first Maestro unit clicked ominously at 3 a.m.
Here’s where most tutorials fail: the dimmer’s internal wiring diagram assumes you’re using *one* load per channel. But our arrays aren’t identical wattages. So you must:
- Calculate max load per channel: 48W ÷ 120V = 0.4A (5000K); 44W ÷ 120V = 0.37A (3500K). Both safely under the Maestro’s 0.5A/channel rating.
- Terminate the SEW cable’s black wire to Channel 1 “LOAD” terminal; white to Channel 1 “NEUTRAL.” Repeat for PAINT on Channel 2.
- Do not share neutrals. Bridging neutrals between channels causes erratic dimming and trips GFCI outlets downstream. I confirmed this by watching my coffee maker reboot twice.
Mount the fixture so its bottom edge sits 32” above your work surface. That gives you 42 foot-candles on the sewing machine bed (measured with a Sekonic L-308X-U) and 38 fc on the painting easel—enough for thread matching and wet-on-wet blending without glare.
Color-Matching Tests: Cotton Duck & Acrylic Swatches, Not Lab Charts
No spec sheet matters until you test on actual materials. I used:
- Cotton duck canvas: 10 oz, natural unbleached (no optical brighteners). Cut into 4” squares. Stretched on small stretcher bars.
- Acrylic swatches: Golden Heavy Body in Cadmium Red Medium, Ultramarine Blue, Yellow Oxide, Titanium White—applied 2mm thick, dried 48 hours.
Under 5000K (sewing mode):
- Thread colors snapped into focus—especially pastels. A pale mint green thread no longer vanished against light linen.
- Cotton duck revealed subtle weave inconsistencies I’d missed for years. Not “good” or “bad”—just accurate. My seam allowances improved 1/32”.
- Acrylic swatches looked washed-out. Cadmium Red lost warmth, reading slightly orange. Fine for checking value contrast, terrible for mixing.
Under 3500K (painting mode):
- Canvas went from “beige” to “warm oat.” Texture softened—great for judging brushstroke flow, less ideal for spotting loose threads.
- Cadmium Red bloomed. Ultramarine Blue deepened, losing its slight violet cast. Yellow Oxide gained earthiness. Titanium White stayed clean—no blue shift.
- Sewing? Forget it. Matching navy thread to denim looked like guessing. I accidentally stitched a seam with 50/50 wool-silk blend thinking it was all silk. (It wasn’t.)
This works because CCT isn’t just “warm vs cool.” It’s spectral emphasis. 5000K peaks in cyan-green—ideal for distinguishing fine fibers and subtle tonal shifts in fabric. 3500K boosts red-orange wavelengths, making pigment interactions legible. It’s physiology, not preference.
Real-World Quirks You Won’t See in the Manual
Dimming curves aren’t symmetrical. The Maestro’s default ramp is linear. But human perception of brightness is logarithmic. So I reprogrammed both channels to use “logarithmic dimming” via Lutron’s Pico remote (model PJ2-2B-GXX). Now, 30% dim feels like 30% brightness—not 12%.
Heat management is non-negotiable. Bridgelux EB Gen3 runs hot at full output. I added 1.5mm-thick aluminum heat sinks behind each strip—glued with Arctic Silver thermal adhesive, not double-sided tape. Without them, lumen output dropped 8% after 45 minutes. With them? Stable for 3+ hours.
Your walls matter more than you think. I painted mine matte Benjamin Moore HC-172 (Chantilly Lace) and added 12” vertical white baffles on either side of the fixture. Why? To bounce 5000K light upward for even fabric inspection, while keeping 3500K directional for pigment work. Without baffles, the 3500K setting created warm halos around paint edges—confusing wet/dry boundaries.
And yes—I keep a physical label on the dimmer: “UP = SEWING (5000K). DOWN = PAINTING (3500K).” Because muscle memory fails at 11 p.m., post-third cup of tea, mid-embroidery crisis.
This Isn’t Luxury. It’s Literacy.
Lighting isn’t ambient mood-setting in a craft room. It’s visual literacy. You wouldn’t write a novel with a pen that changes ink color every time you press harder. Yet we’ve accepted lighting that makes thread indistinguishable from fabric, or cadmium red look like burnt sienna.
Dual-circuit isn’t about having options. It’s about removing doubt. When your 5000K setting renders a 60-weight polyester thread as unmistakably *blue*, not “maybe blue,” you stop second-guessing. When your 3500K setting lets you see the exact moment titanium white turns chalky on a wet acrylic layer—you stop over-blending.
It took me 17 hours total: 5 wiring, 4 mounting, 3 heat-sink gluing, 2 color tests, and 3 staring blankly at the Maestro’s blinking LED wondering if I’d crossed the neutral wires again.
Was it worth it?
My last quilt binding didn’t ripple. My latest plein air study didn’t dry with muddy shadows. And my eyes stopped aching at 4 p.m.
Yeah. It was.