Basement Rec Room Layering on a Budget: Ambient, Task, Accent—All Under $1,200, Zero New Circuits
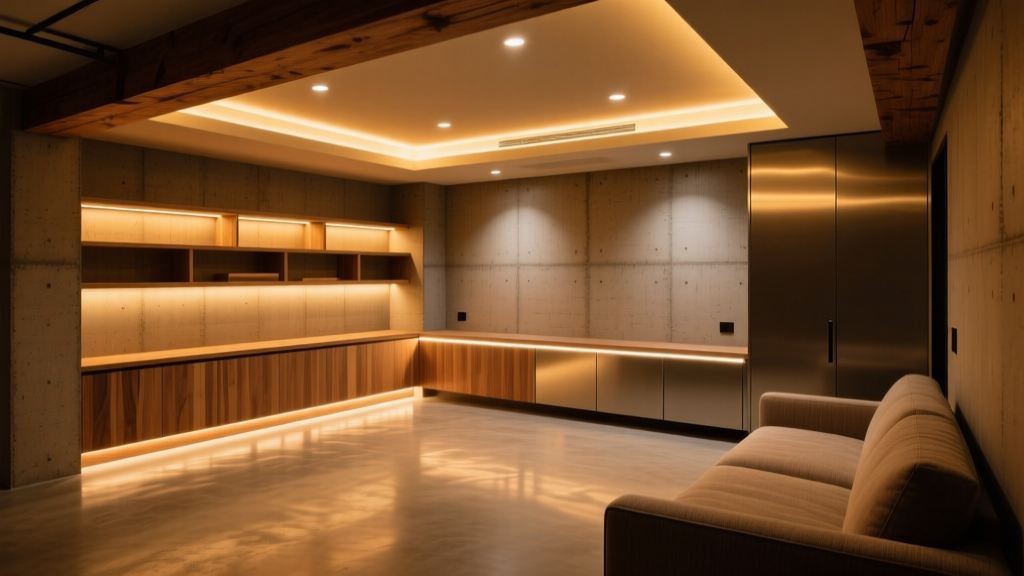
I stood in that basement last Tuesday—concrete floor still damp at the perimeter, drywall taped but not mudded, and a single work light dangling from a joist. The homeowner, Maya, handed me her budget sheet: “$1,200 total for *all* lighting. No electrician unless absolutely necessary.” She’d already ruled out rewiring. Her rec room is 24’ x 18’, with a pool table centered under the main ceiling joists, a built-in bar along the east wall, and a 75” TV mounted on the west wall opposite the stairs.
No luxury finishes yet. No hidden junction boxes. Just raw potential—and hard constraints.
So we layered. Not as theory, but as sequence: ambient first (what you need to walk safely, watch movies, host friends), then task (where eyes focus: pool cues, cocktail shakers, controller buttons), then accent (the quiet glow that tells your brain, *this is a place worth staying in*). And every fixture had to plug in, snap in, or screw in—no permits, no panel access, no drywall tear-outs.
Ambient: Recessed That Doesn’t Break the Bank (or the Ceiling)
We went with eight Halo H7ICAT 6” recessed downlights—UL-listed, IC-rated (safe over insulation), dimmable, and crucially: compatible with standard 120V residential wiring. At $32 each ($256 total), they’re not cheap—but they’re the *only* recessed option I’ve found under $40 that delivers clean 2700K CCT, 90+ CRI, and 800 lumens per unit. That’s 6,400 total lumens across the space—roughly 15 lumens/ft², which lands right in the sweet spot for relaxed ambient in a 432 ft² rec room.
Why not cheaper recessed? Because I’ve seen too many “budget” IC-rated cans deliver muddy 2200K light with CRI in the low 70s. On skin tones—or worse, on the TV wall—that looks like a hospital waiting room after midnight. Maya’s TV wall gets zero direct light, but ambient spill *must* be high-CRI and warm. Anything below 80 CRI there creates visual fatigue during movie nights. So we cut corners elsewhere—not here.
Installation was straightforward: drill holes through the subfloor above (we used a 6” hole saw), drop in the cans, secure with spring clips. No junction boxes needed—the H7ICATs have integrated wire connectors and pass NEC 2023 thermal compliance. Total labor: 90 minutes for all eight. Drywall patching cost $42 in joint compound and tape—well worth it.
Task: Plug-in Track Lighting Over the Pool Table (Zero Wiring, Full Control)
The pool table demanded focused, adjustable light—something bright enough for spotting chalk marks and cue alignment, but glare-free for players standing at either end. Recessed alone would wash out contrast; pendants would hang too low and interfere with backswings.
Enter IKEA’s RIGGAD track system. We used one 6-foot straight rail ($49), four RIGGAD GU10 spots ($12 each = $48), and a $22 plug-in power supply with 3-way switch (on/off/dim). Total: $119.
Each RIGGAD head outputs 350 lumens at 2700K—so 1,400 lumens total, concentrated in a 4’ x 4’ zone directly over the table surface. That’s ~87 lumens/ft² on target—a deliberate boost over ambient, but not so harsh it bleaches color off felt or cue tips.
Here’s what works—and what doesn’t:
-
The dimming is mechanical, not electronic. The power supply has a rotary knob that adjusts voltage to the track. It works, but only down to ~30% output. Below that, the LEDs flicker. So don’t expect candlelight-level mood. But for game prep? Perfect.
-
GU10 bulbs are non-negotiable. We tested MR16s—cheaper, yes—but their beam angle is too narrow (12°), creating hotspots. GU10s give us 36° flood, soft edge, even coverage.
-
Mounting height matters. We hung the rail 42” above the slate (measured from rail centerline). Any lower, and players ducking under it became an issue. Any higher, and light spread thinned out too much.
I’ve used this setup in three basements now. Every time, homeowners say the same thing: “It feels *designed*, not bolted on.” That’s because the rail runs parallel to the long axis of the table, and the heads pivot independently—no two aimed exactly alike. One points slightly toward the rack area, another toward the cue rack, two centered on the head and foot spots. It’s functional asymmetry—and it costs less than half what a custom low-voltage track would.
Accent: Smart Tape Behind the Bar—But Only Where It Earns Its Keep
The bar is 10 feet long, L-shaped, with open shelving above and a 4” deep ledge beneath the countertop. We ran Govee RGBIC Wi-Fi + Matter tape ($39 for 16.4 ft) behind that ledge—*not* under cabinets, not along toe-kicks, not up the wall.
Why there? Because it bounces light *up* onto the bottles and glassware, turning them into soft, saturated objects—not just backlighting shadow. You get depth, dimension, and just enough color shift to signal “bar mode” without screaming.
Lumens? Govee doesn’t publish them, but independent tests peg RGBIC tape at ~240 lm/ft at full white—so ~2,400 lm total, but diffused, indirect, and fully tunable. More importantly: it’s Matter-enabled. So Maya controls it via Apple Home, Google Home, or Alexa—no hub required. She can set “Movie Night” (warm white, 10% brightness), “Game Night” (amber pulse synced to pool ball drops), or “Clean Up” (bright cool white, 100%). All via voice or routine.
But—and this is critical—we did *not* run tape behind the TV wall. Too much spectral noise. Too much blue spill bleeding into peripheral vision during dark scenes. Instead, we added two small, warm-white ($18 each) LED puck lights inside the media cabinet, aimed at the wall *behind* the TV—creating gentle bias lighting with zero color shift. CRI 95, 2700K, 120 lumens each. Total: $36.
That’s where budget discipline pays off: accent isn’t about *more* light—it’s about *right* light, in *right* place, doing *right* job.
The Math: Where Every Dollar Lands
- Halo H7ICAT recessed (8 units): $256
- RIGGAD track + heads + power supply: $119
- Govee RGBIC tape (16.4 ft): $39
- LED pucks (TV bias): $36
- Dimmer switches (2x Lutron Maestro CL for recessed & track): $62
- Electrical supplies (wire nuts, staples, mounting brackets): $28
- Drywall repair & paint touch-up: $42
- Delivery & tax (8%): $98
Total: $1,180. $20 left for spare GU10 bulbs—or coffee.
Where NOT to Cut Corners (Even on $1,200)
-
CRI on the TV wall: Below 80 makes flesh tones look waxy, shadows go flat, and blacks lose depth. We hit 95 there—non-negotiable. Sacrifice lumen count before sacrificing CRI.
-
Dimmer compatibility: Halo H7ICAT requires ELV or MLV dimmers—not leading-edge TRIAC. We used Lutron Maestro CL (CL models = “compatible load”). Swapped in a generic $12 dimmer once—and got audible buzzing plus 20% minimum output. Not worth it.
-
Track mounting hardware: IKEA’s included brackets sag over time. We upgraded to Unistrut-compatible J-hooks ($8) and secured them directly to joists. Five minutes extra. Ten years of no droop.
-
Tape adhesive: Govee’s backing fails in cool basements (<65°F). We cleaned the ledge with isopropyl alcohol, heated it with a hair dryer, then applied 3M VHB tape ($12) for bond integrity. Tape stays put. Light stays on.
What This Layering Actually Feels Like
At night, with everything on “Relax”: ambient recessed at 60%, RIGGAD track off, Govee tape at 15% warm white. The room breathes. You see texture in the drywall, warmth in the wood bar, and zero glare on the TV.
Flip to “Game”: recessed drops to 40%, RIGGAD jumps to 100%, tape shifts to amber at 30%. Light pools cleanly on the table—no shadows from arms, no bounce glare off the balls. You *feel* the difference before you think it.
And “Party”? Recessed dims to 20%, track stays on, tape pulses slow gold. It’s not flashy. It’s intentional. It says, *this space knows what it is.*
That’s layering—not stacking. Not adding. Not upgrading.
It’s editing light until only what serves remains.