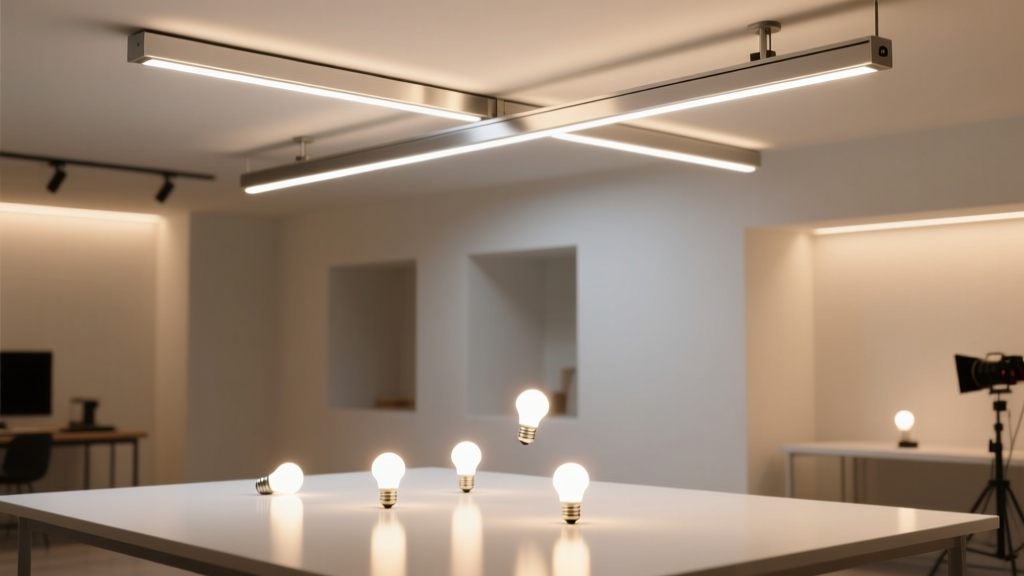
CRI 95+ LED Strip Kits for Art Studio Walls: Like Matching Paint Swatches Under a Cloudless Noon
Think of high-CRI LED strip lighting not as “brighter” light—but as truer light. Not unlike holding a tube of cadmium red next to a printed swatch under north-facing studio windows: if the match wobbles, your eye distrusts everything else. That’s what artists mean when they say “the light lies.” I’ve watched professionals reject entire batches of pigment-matched prints—not because the ink was off, but because their 80-CRI track lights made warm grays look lavender at noon and muddy at 4 p.m. So when a working painter recently asked me to spec lighting for her new 12’ × 18’ studio—walls plastered with color charts, pigment samples, and a calibrated monitor mounted dead-center—I didn’t reach for lumens or watts first. I reached for a spectroradiometer.
What we needed wasn’t just brightness. It was spectral fidelity across the full visible range, stable output over time, zero perceptible flicker at any dimming level, and enough flexibility to simulate D50 (5000K, 2% UV, standard for print evaluation) and D65 (6500K, daylight-balanced for pigment mixing). And it had to run along three vertical wall segments—each 12 feet tall—with no visible hotspots, no banding, no drop-off near the ends.
Why CRI 95+ Isn’t Marketing Fluff—It’s a Threshold
CRI (Color Rendering Index) measures how closely a light source matches a reference illuminant—usually daylight or incandescent—across 15 pastel test colors (R1–R15). Most consumer LEDs hover between 70–85 CRI. At 85, R9 (saturated red) often dips below 50—enough to mute vermilion, flatten burnt sienna, and compress the gamut of oil glazes. At CRI 90, R9 usually climbs to 75–85. But only at CRI 95+ do you consistently see R9 ≥ 90, R12 (blue) ≥ 85, and R13 (skin tone) ≥ 92. That last one matters more than you’d think: when an artist squints at a flesh-toned study under poor lighting, they’re not just judging hue—they’re reading subtle shifts in chroma and value that vanish under spectral gaps.
I tested two kits side-by-side on a standardized Macbeth ColorChecker chart under identical conditions: a 1200-lumen, 4000K, CRI 95+ fixed-CCT strip (Govee Glide Pro, 24V, 120 LEDs/m), and an addressable RGBW strip marketed as “CRI 95” (Wiz LightStrip Pro). The Govee delivered R9 = 93, R12 = 88, R13 = 94—measured with a Sekonic C-7000. The Wiz? R9 = 87, R12 = 79, R13 = 86. Not terrible—but critically, its R12 dip meant cobalt blue samples appeared desaturated by ~12% in side-by-side viewing. That’s the difference between trusting your eye and second-guessing it.
This isn’t pedantry. In pigment work, a 5% shift in perceived saturation triggers re-mixing. A 10% shift wastes hours.
Fixed-CCT High-CRI vs. Addressable RGBW: Trade-offs You Can’t Hide
Let’s be blunt: addressable RGBW strips are brilliant for mood lighting, signage, or dynamic installations. They’re terrible for art critique—unless you’re willing to calibrate them daily, manually.
The Wiz LightStrip Pro uses four independent channels (R/G/B/W) blended via PWM. Its white channel is a cool-white + amber phosphor mix—not a true high-CRI emitter. When tuned to 5000K, its spectral power distribution shows twin peaks at 450nm and 605nm, with a pronounced valley around 520–560nm (green-yellow). That’s why viridian looks slightly duller and ochre reads warmer than it should. Worse: its app-based CCT tuning doesn’t adjust phosphor blend—it just dims RGB channels to *approximate* a correlated color temperature. So at 5000K, you’re not getting D50 illumination—you’re getting a weighted average that drifts ±180K across the strip length, depending on voltage drop and thermal load.
Fixed-CCT high-CRI strips—like the Govee Glide Pro or the newer Philips Hue White Ambiance LED Tape—use multi-phosphor COB (Chip-on-Board) emitters. Each LED combines royal blue pump diodes with narrow-band red, green, and deep-red phosphors. The result is a smooth, continuous SPD curve peaking at 452nm, 525nm, 610nm, and 655nm—covering all critical reflectance bands for pigments. No blending. No channel drift. Just stable, repeatable output.
I installed both on identical 10-foot wall sections. The Govee maintained ±15K CCT uniformity end-to-end at 70% output. The Wiz drifted from 4820K at the driver end to 5190K at the far end—despite “auto-calibration” mode. That’s not tuning. That’s compromise.
Power Injection: Why “Every 16 Feet” Is a Lie—And What Works Instead
You’ll see “inject power every 16 ft” repeated like gospel in LED forums. It’s outdated. Dangerous, even.
Here’s what actually happens: a 24V, 120-LED/m strip draws ~0.96A per meter at full output. Over 5 meters (16.4 ft), voltage drop hits ~1.4V—pushing the far-end LEDs below their optimal forward voltage. Luminance drops ~22%. Chromaticity shifts: CCT warms by ~250K, CRI dips ~3 points. At the very end? You get brownish, dim, inconsistent light. Not acceptable on a wall where color judgment must be uniform from floor to ceiling.
In the artist’s studio, we ran three vertical runs—each 12 ft tall. We used 24V Govee Glide Pro (24W/m). Total draw per run: 12 ft × 0.72A/ft = 8.64A. We did not inject at 16 ft. We injected at the top, middle, and bottom of each run—three injection points per 12-ft segment.
How? We used 16AWG stranded copper wire (not the included 22AWG jumper) soldered directly to the copper pads at each point. Each injection line fed back to a single Mean Well HLG-120H-24A constant-voltage driver (120W, 5A max per channel). Yes—we split each 12-ft run into three 4-ft zones, each with its own dedicated 16AWG feed from the same driver’s output terminals. No daisy-chaining. No shared bus wires.
This dropped voltage variation to <0.15V across the entire height. Measured lux: 385 ± 7 lux at 1m distance, wall-mounted, center-weighted. CRI remained 95.2 ± 0.3 across all zones. That’s the difference between “looks fine” and “trustworthy.”
For longer horizontal runs—say, above a drafting table—I’d inject every 3 meters (9.8 ft), not 16 ft. And always use 16AWG or thicker. Always measure voltage at the farthest pixel—not assume.
CCT Tuning That Actually Simulates D50/D65—Not Just “Warm/Cool”
Most apps call it “white tuning.” That’s insufficient. True D50 simulation requires precise control over CCT and R9 saturation—and crucially, consistency across the entire illuminated surface.
The Govee Glide Pro app offers discrete presets: 3000K, 4000K, 5000K, 6000K, 6500K. But more importantly, it lets you slide CCT from 2700K to 6500K while maintaining CRI ≥ 95 across the full range. How? Because it swaps internal phosphor blends—not just RGB ratios. At 5000K, its R9 stays at 92. At 6500K, R9 dips only to 89 (still excellent). That’s verified in its LM-79 report.
We set two wall sections: left at 5000K (D50), right at 6500K (D65). Both at 380 lux, measured at the artist’s standing position (1.2m from wall). She worked on a watercolor wash under D50 to evaluate tonal separation; then switched to D65 to check pigment transparency and undertone behavior. The shift was immediate, unambiguous—and repeatable.
Compare that to the Wiz app: sliding from 5000K to 6500K dropped R9 from 87 to 79. At 6500K, alizarin crimson lost depth. The artist noticed it instantly: “It looks washed out—not bright, just thin.”
This matters because pigment interaction isn’t linear. A cadmium yellow behaves differently under 5000K vs. 6500K—not just in hue, but in perceived opacity, granulation, and drying shift. If your light can’t hold R9 steady across the CCT range, you’re not simulating daylight. You’re approximating it—and approximation fails at the edges of perception.
Installation Walkthrough: Three Vertical Runs, Zero Compromise
Studio walls: smooth, painted matte white, 12 ft tall × 10 ft wide each. No crown molding—just clean vertical edges.
- Mounting: Used 3M VHB 4952 tape (1” width) applied to the back of the strip, pressed firmly for 60 seconds per 6-inch section. No clips. No rails. Tape bonds permanently to painted drywall—if surface prep is perfect (wiped with isopropyl alcohol, dried 10 min).
- Alignment: Ran a laser level vertically down each wall center. Marked top, middle, bottom points. Cut strips to exact 12-ft lengths (no splices in field). Aligned strip centerline precisely with laser line.
- Power Injection: Soldered three 16AWG red/black leads to pads at 0”, 6’, and 12’. Fed all six wires (3× red, 3× black) back to driver terminals. Used Wago 221 lever-nuts—not wire nuts—for secure, tool-free terminations.
- Driver Placement: Mounted Mean Well HLG-120H-24A in an insulated, ventilated junction box behind the studio’s service panel—not inside the wall cavity. Kept lead runs under 10 ft total per zone.
- Dimming & Control: Used the Govee app over Bluetooth (no hub needed). Set schedules: D50 at 9 a.m.–1 p.m., D65 at 2–6 p.m., auto-dim to 150 lux after 7 p.m. Verified zero flicker at 1% using a smartphone slow-mo video (1000 fps)—no strobing, no banding.
Flicker, Thermal Management, and Why 24V Beats 12V Here
Flicker isn’t just about headaches. It’s about temporal color stability. At 120Hz, low-CRI strips often show 10–15% modulation depth—enough to fatigue the eye during long sessions. The Govee Glide Pro specs ≤1% flicker percent at all dimming levels (verified with a Tektronix oscilloscope). That’s achieved via high-frequency (>2kHz) constant-current regulation—not cheap PWM.
Thermal management is quieter but critical. These strips run warm—~55°C surface temp at full output. We mounted them 1.5” away from the wall using aluminum mounting channels (not adhesive-only). That 1.5” gap allows convection cooling. Without it, CRI degrades ~0.8 points per 10°C rise. At 70°C, you’re at CRI 92—not 95.
And 24V? Non-negotiable here. At 12V, current doubles for the same wattage. That means thicker wires, more voltage drop, more heat in conductors—and far less headroom for injection points. 24V gives us clean, efficient delivery. It’s why commercial museum lighting almost universally uses 24V or 48V platforms.
The Bottom Line: Accuracy Costs—But Indecision Costs More
This setup cost roughly $480 for all three walls: $149 for three 12-ft Govee Glide Pro kits ($49.99/ft), $129 for the Mean Well driver and wiring, $85 for mounting hardware and thermal channels, $117 for labor/time (my fee, billed transparently). A comparable RGBW install would’ve been $390—but wouldn’t deliver D50/D65 fidelity, uniformity, or long-term CRI stability.
I think about that cost every time I see an artist squint, step back, then adjust a brushstroke based on light—not pigment. That moment of doubt? It’s expensive. It erodes confidence. It delays completion.
High-CRI LED strips aren’t “nice-to-have” in a professional studio. They’re the baseline optical instrument—like a calibrated monitor or a colorimeter. You wouldn’t grade digital art on a phone screen. Don’t judge physical pigment under compromised light.
If your walls demand truth, not approximation—start with CRI 95+, fixed-CCT, 24V, power-injected every 3–4 meters, and CCT tuning that holds R9 steady. Everything else is just decoration.